Thursday, September 5, 2013

Awesome Free Printables to Keep You Organized

I have to say that the free printables, are in fact, not made by me. I lack the necessary skills to create something like that so I rely on all the other bloggers to help me out.

I happened to stumble upon DIY Home Sweet Home and Jamie the creator, through Pintrest. I had been wanting to make a Home management binder for some time now and her printables popped up while I was searching around.

They are just amazing. Bright and colorful and enough to get you organized and ready to rock. You can find all of them HERE.


Anyway, yesterday I needed to make a few notes on some organizing projects that I wanted to tackle. Since our oldest has started kindergarten I needed to jot some things down about updating my commander centers. I have 3 total and they were just getting over run by paper piles, boxes stacking up and overflowing arts and crafts.
 I printed out the Jot It worksheet and starting noting (above). While on the phone this afternoon, my oldest thought she would add her ideas too! (below)
 She told me she was making me happy pictures and that I still had three more spaces to write. She was totally right, but I am anal about keeping my notes a certain way. Then I told her it was not nice to mess up mommy's work and to ask next time. (I really couldn't get angry with cute drawings like these)
 She told me she was sorry and ran off into the new homework/school station. She emerged 5 minutes later with a new jot it page for me, her own creation!

I will definitely be using hers, just as soon as the other is all filled in!
Just a quick note about the jot it page. I keep several blank ones in my folder and purse and planner. I use them for blog post scheduling, project planning, and party planning.
They keep me organized and all my notes and plans are together on one page (one page per subject/project).
Check out Jamie's website DIY Home Sweet Home for your own copy!

Friday, August 30, 2013

Roadside Basil Stand - One Dollar a Bunch

I have always wanted to have a roadside farm stand. I love growing and preserving the fruits and veggies from the garden and when I have a abundance it would be fun to set up a cute stand in the shaded yard and chit chat with fellow neighbors and passer byes. 

In the afternoon, last week that is what we did...sort of.

 I had a over abundance of basil. My freezer in stuffed with pesto, plain basil cubes, and basil in olive oil. My only thought was to have a basil stand instead of a lemonade stand. Allison thought it was brilliant.
 We set up shop at the end of the driveway. I grabbed my shabby stools from the garage and a few dollar store finds to display the basil.
 we probably had about 25 large bunches of basil for sale. Not a single person stopped by to chit chat or share gardening tips.

 But this little one was super happy. She sold 2 bunches of basil to our neighbor and got to keep the money all for herself (well only one of the dollars, brother got the other one).
Next summer we will definitely do it again. It was fun and something totally different from the norm. 
Maybe next time I will sell peppers since I am really good at growing those too. Maybe I will advertise. Maybe I will sell some folk art stuff and my canned jam and plants and seedlings and swap recipes and sell flower bunches...
a girl can dream! 

Wednesday, August 28, 2013

Quick Pizza Margarita

One of my favorite pizzas is the simple, yet satisfying, pizza margarita. I love the fresh flavors that blend together creating a deliciousness that you begin to crave and then become obsessed with and have to make that one food everyday to tame the beast within.

Maybe that's just me. 

Anyway, with it being summer and all, I thought I would whip up some pizza margarita with the fresh goodies from our garden.
Here is my quick version with a premade crust

I started with a Crossfire Naan bread that I purchased from Costco. I love this naan, it's thick and chewy and makes a great base for many pizzas and delicious dipped in hummus.
I also gathered some tomatoes, basil, marinated mozzarella, and some Hirten Cheese to grate on top.

 Please never mind the wall, we were in the middle of phase one of our kitchen remodel.

look at all those yummy ingredients...mmm...
 I really don't like to dirty to many dishes so I cook a lot with my hands (that might explain why I have a horrible habit of washing my hands every time I touch anything at all). I tore the mozzarella into bite sized pieces and tossed them on the naan that I brushed with the marinade in the cheese balls.

I had my helper grate some of the Hirten on top of that.

 She did an awesome job and I found if she cooks with me and gets to have some hands on time with the food, she is more likely to eat and enjoy the food.

More cheese being grated, most of it ended up on the baking sheet but I scooped it up and we sprinkled.

I then sliced some romas and put them on top of the cheese and grated more cheese on top of that. I baked it at 400 degrees (I bake everything at this temp. so if you have any questions on oven temp, I will reply 400 sounds about right). I think I timed it at about 12-15 minutes. just check to make sure the cheese is bubbly and it's heated through.
 After it cooled for about a second I tore some basil and scattered it about, then sliced and served.

A most delicious, quick, and fresh lunch enjoyed be my and my daughter on our girly day!

I hope you enjoy, and leave me a comment if you have any questions!

Wednesday, August 14, 2013

The Best Invention - A Busy Box for Tinkers

We are in the process of remodeling our kitchen for the second time - expanding into the garage to make it larger and more family friendly. While sorting through drawers and such I just tossed things into a storage box for later, mostly things from the junk drawer.

Leaving it on the floor for further adding too, I never thought it would bring such joy to my little boy.

 He can sit in the kitchen for hours just tinkering away making inventions and building robots. He created a "sink" the other night from a valve, some washers and a small plastic light bulb then took it apart to create something else.

He was really overjoyed when dad let him use a real screw driver to make his "inventions". It has been the best and cheapest busy box we have found that can keep him occupied for so long. And every time I need to throw something into the junk drawer, I toss it into the invention box instead. I know he will create something fantastic and imaginative with it.


Here is a list of some of the things inside the busy box for tinkers:
          pipe cleaners
          clothes pins
          foam popsicle sticks
          screws leftover from IKEA furniture
          hinges from the cabinet we removed
          some tape
          empty medicine bottles (also great for sorting screws and making instruments)
          lids from a couple of Pringles cans
          a few springs, washers, fabric scraps, allen wrenches

I will be adding to the box very soon since I had not one, but two junk drawers in the kitchen. In that one I think I have some extra cords, extra flashlight, bottle caps, cabinet bumpers and some odds and ends that he will enjoy much more than me. And I will have space for more cooking utensils or spices.


Monday, April 8, 2013

DIY Family Command Center - Update

If you had read my previous post about my family command center we created out of a highly unorganized closet in our front room. The closet is narrow and was really poorly planned.

Since the project was finished I have added a few elements that help to keep my kids stuff organized as well as some of there activities and school things together.

I purchased 4 file boxes, 2 for each. One contains files for each year. I keep important papers, artwork, school work, stuff like that, in the bottom boxes. On top of those I keep a box full of busy bags for each of them along with a box of puzzles and a an open box for each containing Innotabs, current art in progress, pencils, etc.

It stays pretty organized most of the time. 

Until a bored 2 year old decides to get something out of the closet. You realize something is wrong when it's been quiet for 30 seconds and decide to check if he needs help with his busy bags.

Then you get this.

 He decided he needed to empty his busy box and the puzzlebox and sissy's busy box so he could climb into the puzzle box and toss remaining puzzle pieces onto the floor.

Do you often wonder what goes on in the mind of a 2 year old boy?

Thursday, April 4, 2013

April Showers

It was quite an uneventful day in the garden today. The April showers have started and it's going to be off and on all weekend - total bummer.

I did put on a coat and hat and made my way outside a few times today to check on my greenhouse full of peppers, tomatoes, marigolds, eggplants, herbs, and cucumbers. Amazing everything seems to do better when the weather is rainy and warm.

8 sunflowers have sprouted in the cucumber patch. I realized I need more if I plan to use them as a trellis for the cucumbers. I think this idea is going to look really pretty when everything is in full bloom and the bees will love the flowers.

The kids played a lot of play dough and crafts. This keeps them busy for hours. Give them a rolling pen, some cookie cutters and a clear working space and they are immersed in there work. While they played it gave me a few minutes to sketch out some more ideas for the greenhouse/office. If you follow me on Pinterest you are probably seeing a few ideas I have pinned. I am just combining all the elements I like and drawing up some plans.


I do have a quick tip to share today. I really don't know why this idea has never popped in my head before.

When prepping a jar of homemade chicken broth for the freezer I cut some notebook paper to fit under the ring of my mason jar then labeled with the contents and date.
Totally easy and I can see at a glance what I have and the date I threw it in the freezer. It also saves time when washing, no more scrubbing permanent marker off lids or jars.

How do you label jars? What kind of system do you have when organizing your freezer? Leave a comment, I love to hear from you!

Hope you all had a wonderful Spring day where you are!

Tuesday, April 2, 2013

Ranch Flavored Snack Mix - Oyster Cracker and Mixed Nut Combination

If I would say so myself, I am queen of snack mix mixing. I love making snack mix. It combines all the delicious tidbits I like and is easily munchable.

I usually just take ingredients I have on hand and stir them together to create a tasty snack.
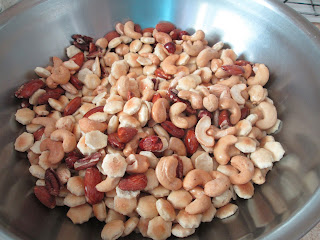
One snack mix I recently made was a ranch flavored mixture of mixed nuts and oyster crackers (a lot of mixing in this sentence).


 I combined the entire 16oz package of oyster crackers with about a half cup of the mixed nuts. I drizzled it with a bit of olive oil, just enough to coat it, then I added the ranch dressing mix about 3 tablespoons. You can always adjust the flavorings to your liking: more ranch or olive oil wouldn't hurt the recipe, it would just make it either a little more oily or a little more salty.

After mixing well to coat all the morsels, spread it on a baking sheet. Bake in a preheated 200 degree oven for about an hour mixing every 15-20 minutes.
 Let the snack mix cool completely. Store in an airtight container (like my reused almond jar) and enjoy.

It really is quite tasty and the kids love it. I sometimes add craisins or raisins to it before putting it in their lunches for a sweet and salty snack.

Hope you enjoy!